The DotSimple Chrome Extension enables you to send text and images directly to your DotSimple workspace. Whether you're drafting a social media post or collecting visuals for your content, this extension saves time and keeps your workflow seamless.
Send Selected Text: Highlight any text on a webpage, right-click, and send it to your DotSimple workspace as a draft.
Send Images: Hover over any image, click the DotSimple icon that appears, or use the right-click menu to send the image directly to your DotSimple accounts.
Account Selection: Choose the accounts where your text or images should be sent.
Easy Setup: Connect your DotSimple account once, and you’re ready to go.
Download the Chrome Extension
Download the DotSimple Chrome Extension from the Chrome Web Store and install it.
Open the Extension
After installation, you’ll find the DotSimple extension icon in your browser’s toolbar (usually in the top-right corner).
Add Your API Key - Create an Access Token
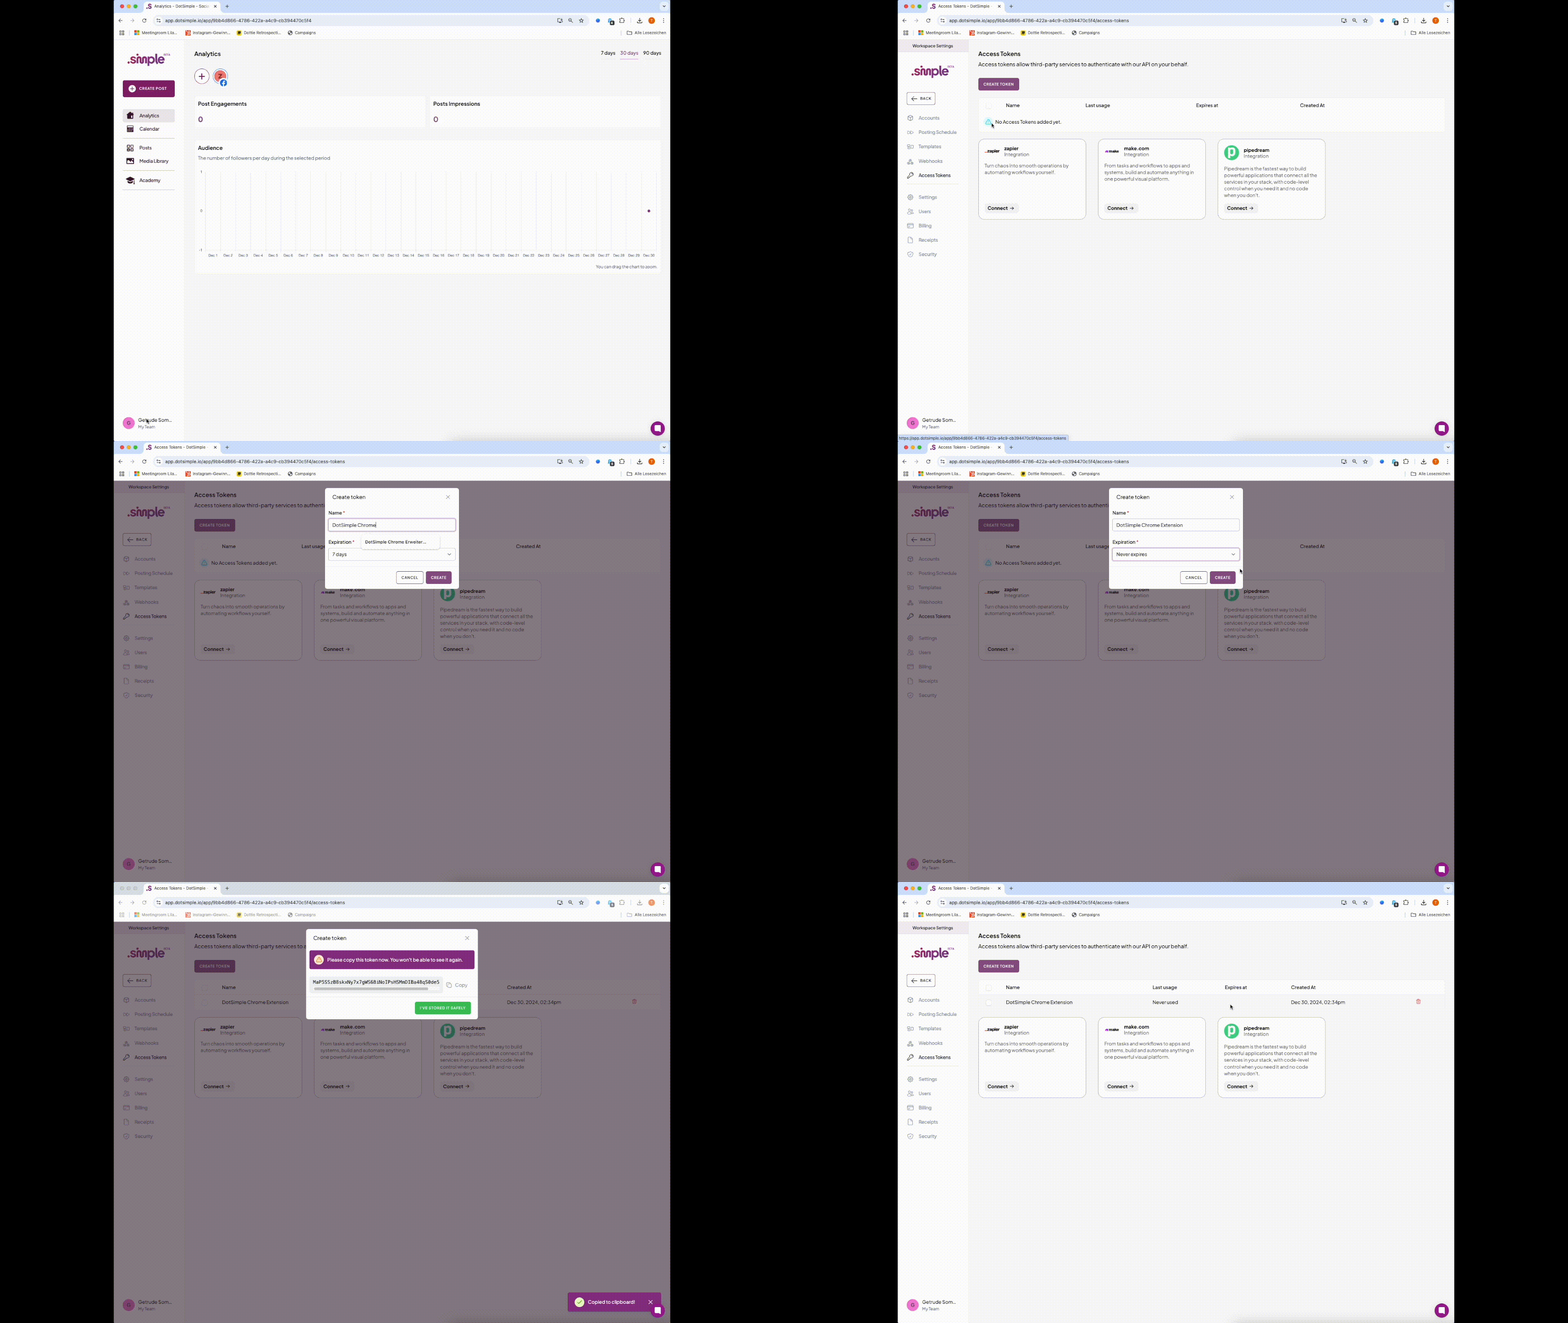
To connect the extension, you’ll need an Access Token. Follow these steps to create one:
Open DotSimple and click on your name or initials icon in the bottom-left corner.
Select Settings from the menu.
Go to the Access Tokens tab and click on the Create Token button.
Enter a name for your token, e.g., “DotSimple Chrome Extension.”
Set the expiration date to “Never expires.”
Click Create. Before the token is generated, you’ll be asked to enter your password to confirm the process.
Important: Copy the token immediately and store it securely (e.g., in a password manager or a secure note). The token will not be visible again.
We’ll use this token in the DotSimple Chrome Extension after copying the Workspace ID in the next step.
Add Your Workspace UUID - Find Your Workspace ID
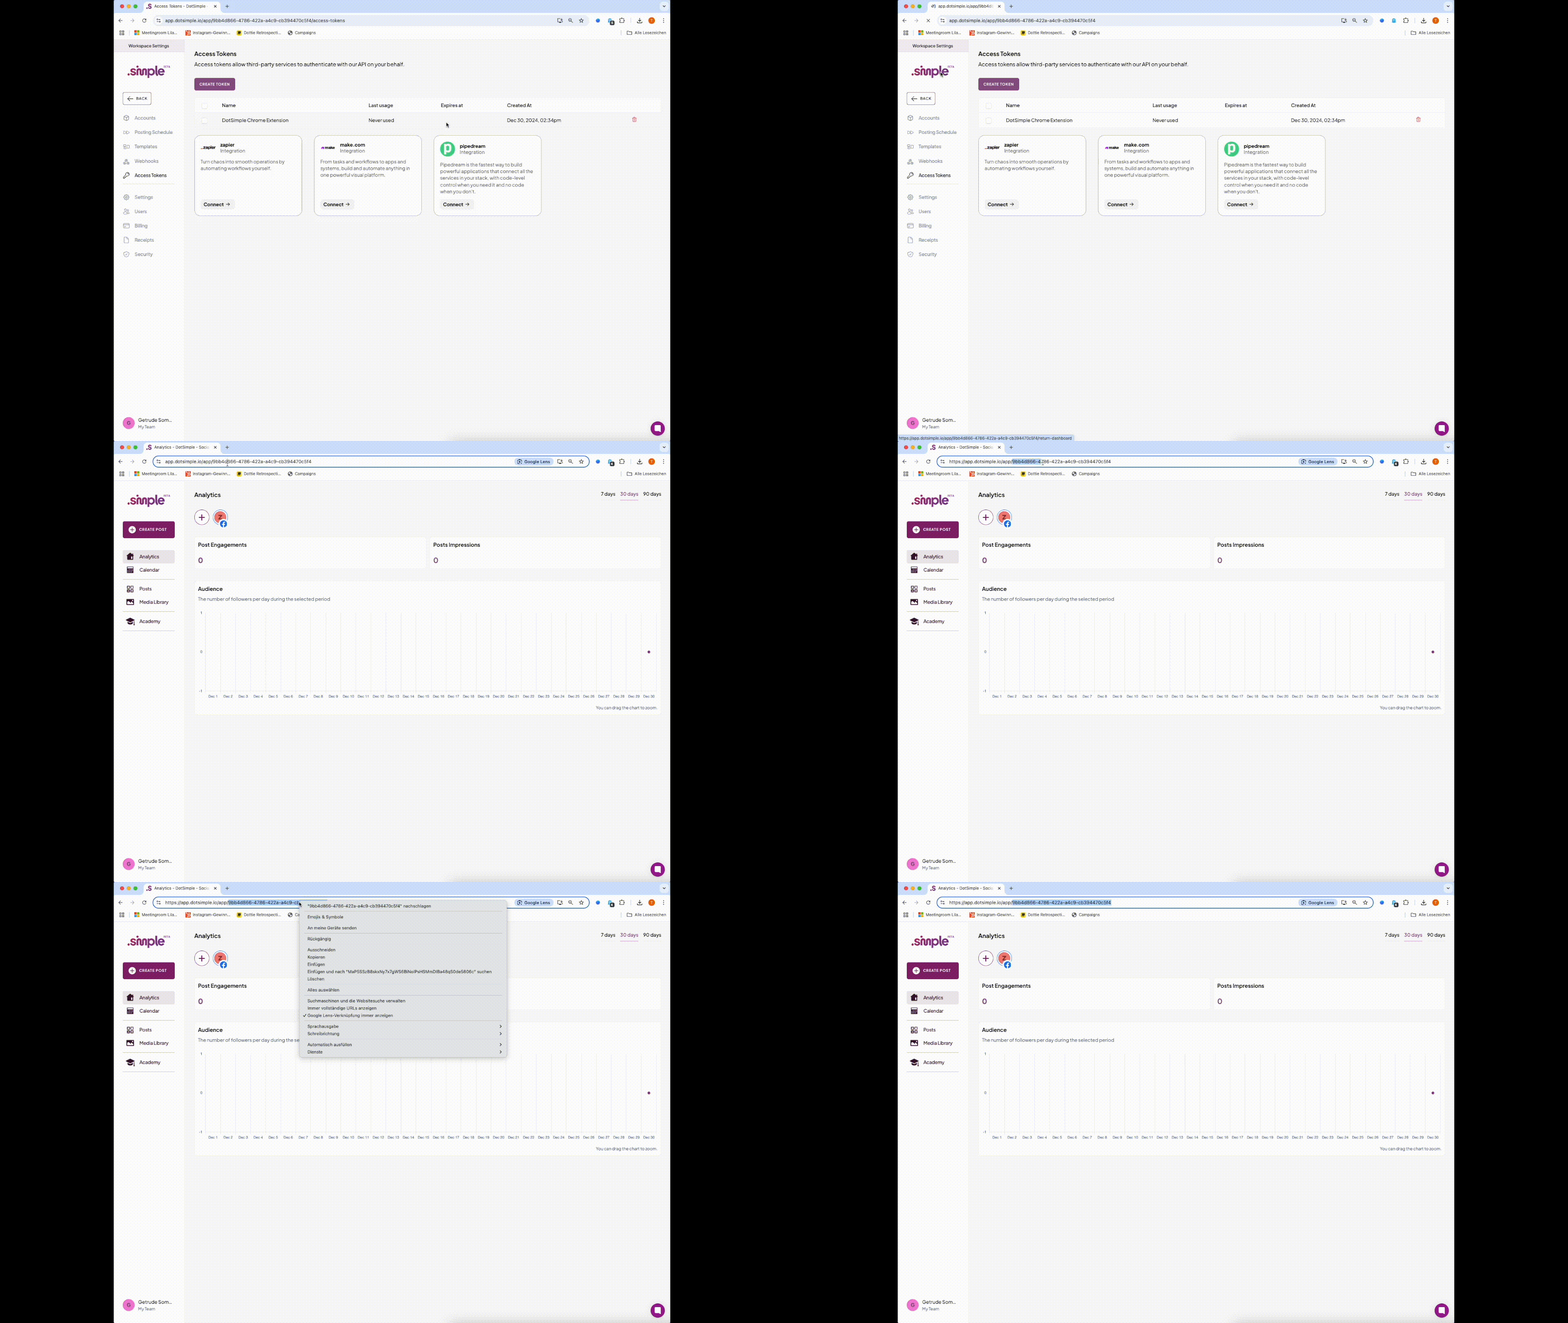
Your Workspace ID is a unique part of the URL for your DotSimple workspace. Here’s how to find it:
In DotSimple, click on either the Analytics Dashboard or the DotSimple logo in the top-left corner.
Check the URL in your browser’s address bar. It will look something like this:
https://app.dotsimple.io/app/<workspace-id>
The part after https://app.dotsimple.io/app/ (z.B. 12a6c1d3-7042-40d1-879f-f9f696ea6ab1) is your Workspace ID.
Note: If you’re in another section of DotSimple, like the Calendar, the URL may look different, e.g.,
https://app.dotsimple.io/app/<workspace-id>/calendar.
Make sure to only copy the part of the URL that includes the Workspace ID.
Example:
If the URL is https://app.dotsimple.io/app/12a6c1d3-7042-40d1-879f-f9f696ea6ab1/calendar
your Workspace ID is: 12a6c1d3-7042-40d1-879f-f9f696ea6ab1
Copy the Workspace ID.
Configure the Extension
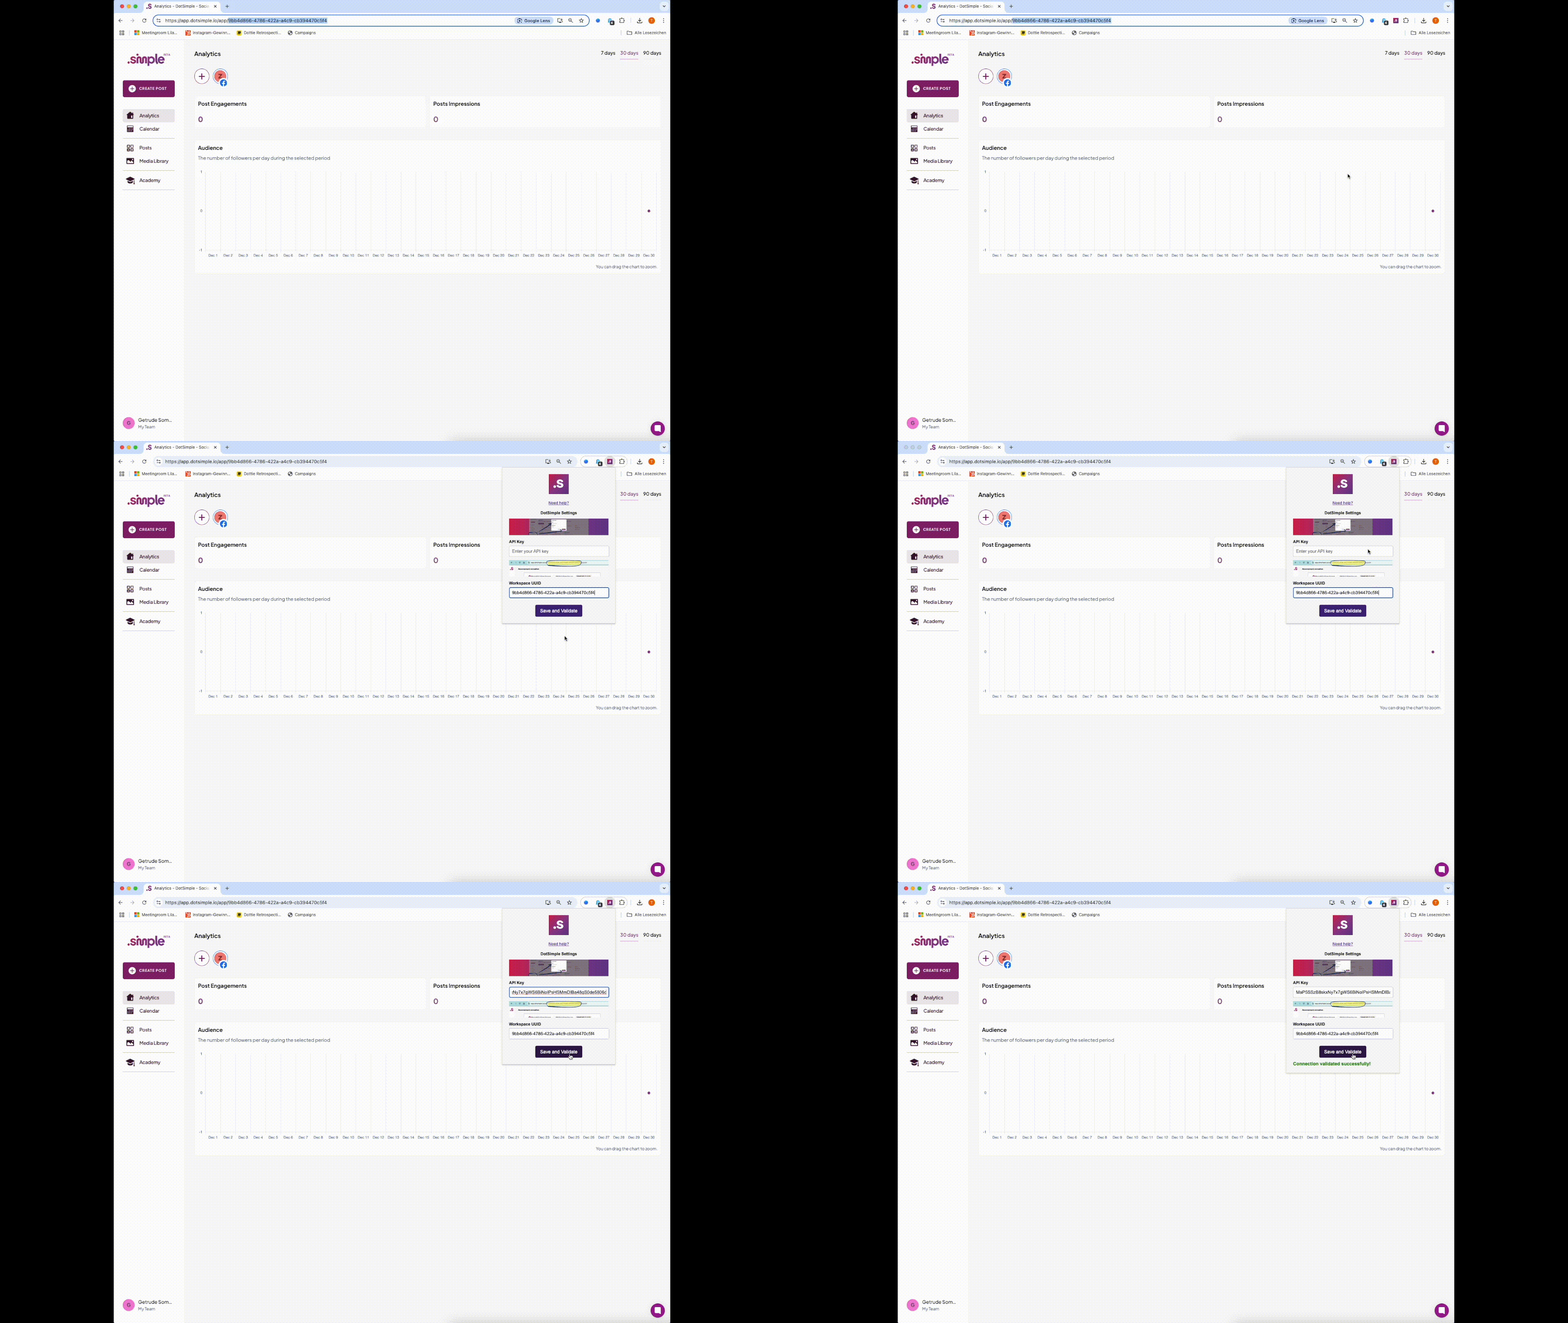
Click on the DotSimple extension icon in your browser toolbar (usually in the top-right corner).
Enter your Workspace ID in the “Workspace UUID” field (it should still be in your clipboard).
Then, paste your Access Token into the “API Key” field (the one you saved earlier).
Click “Save and Validate”.
The extension will confirm your connection, and you’re ready to go!
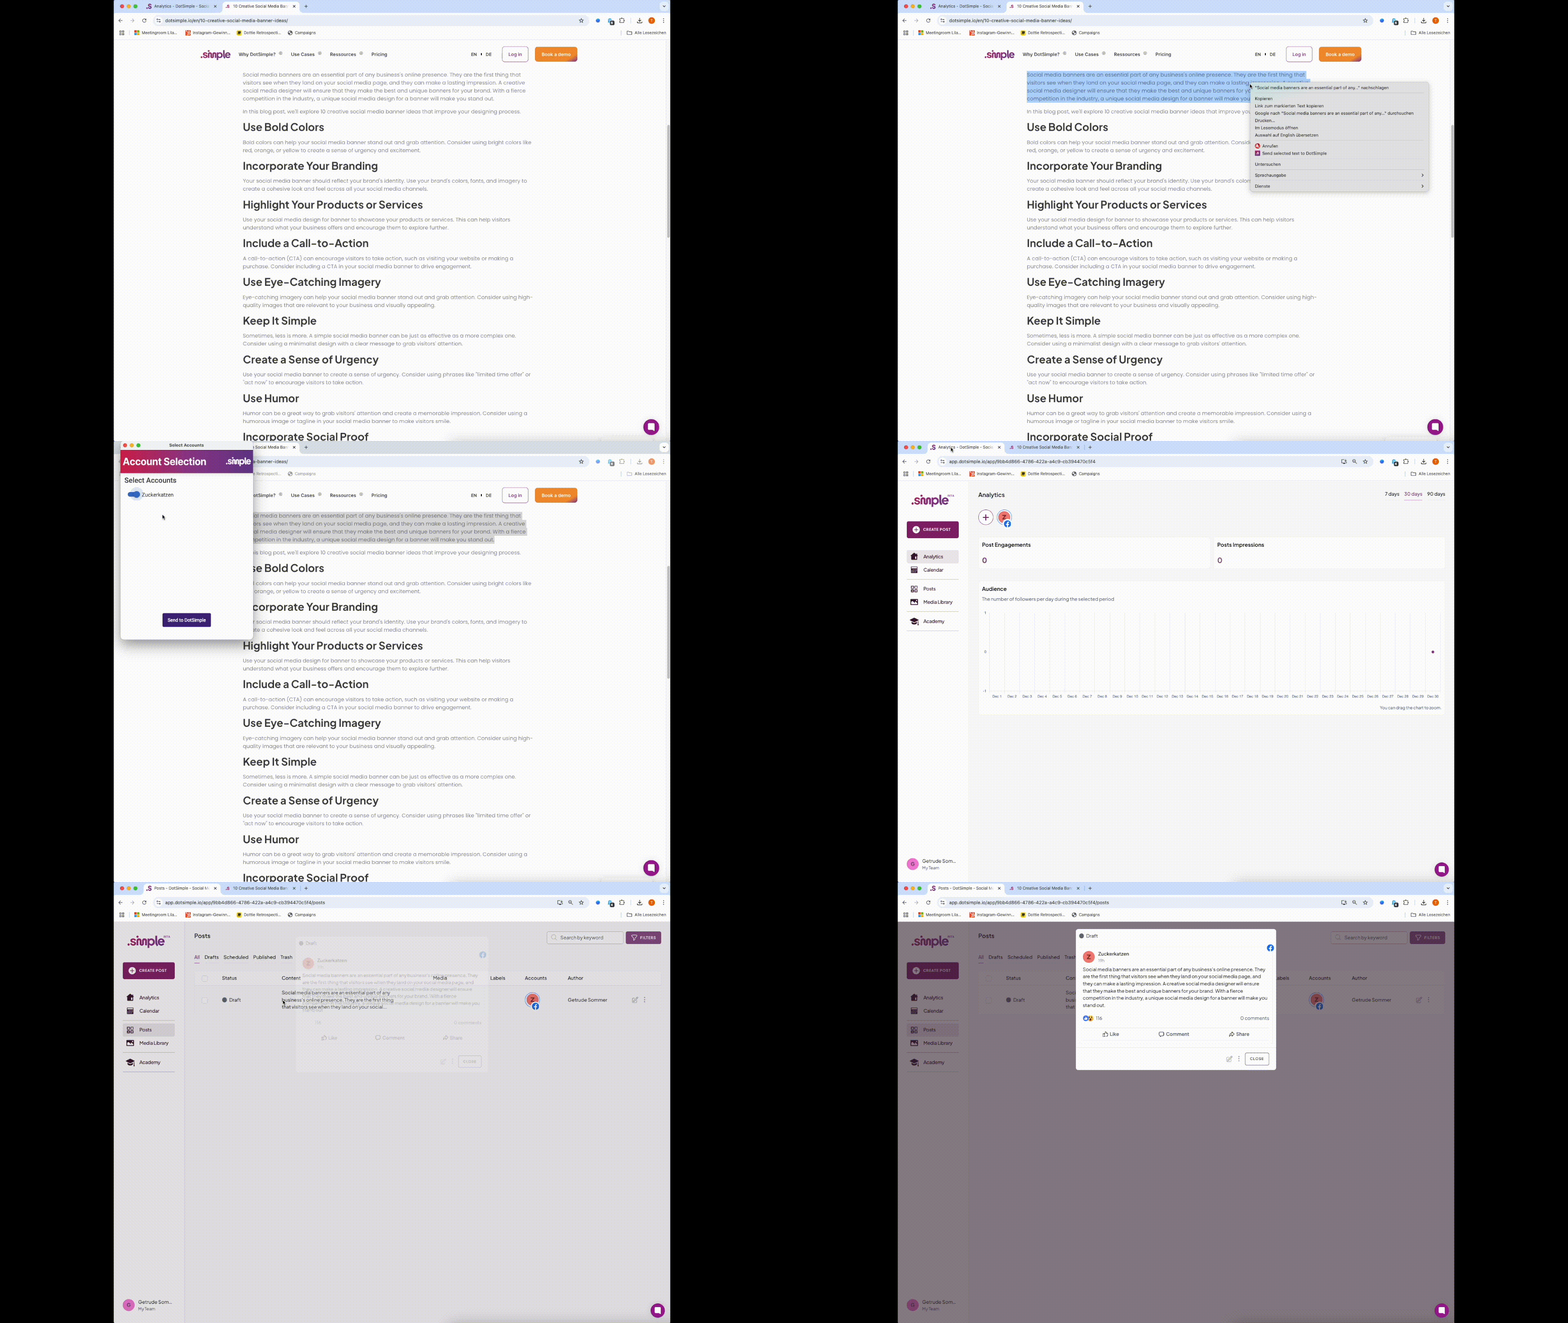
Highlight the text on any webpage that you want to send.
Right-click the selected text.
Choose "Send selected text to DotSimple" from the menu.
A popup will appear for you to select the account(s) where this draft will be sent.
Confirm your selection. You’ll receive a success notification once the draft is sent.
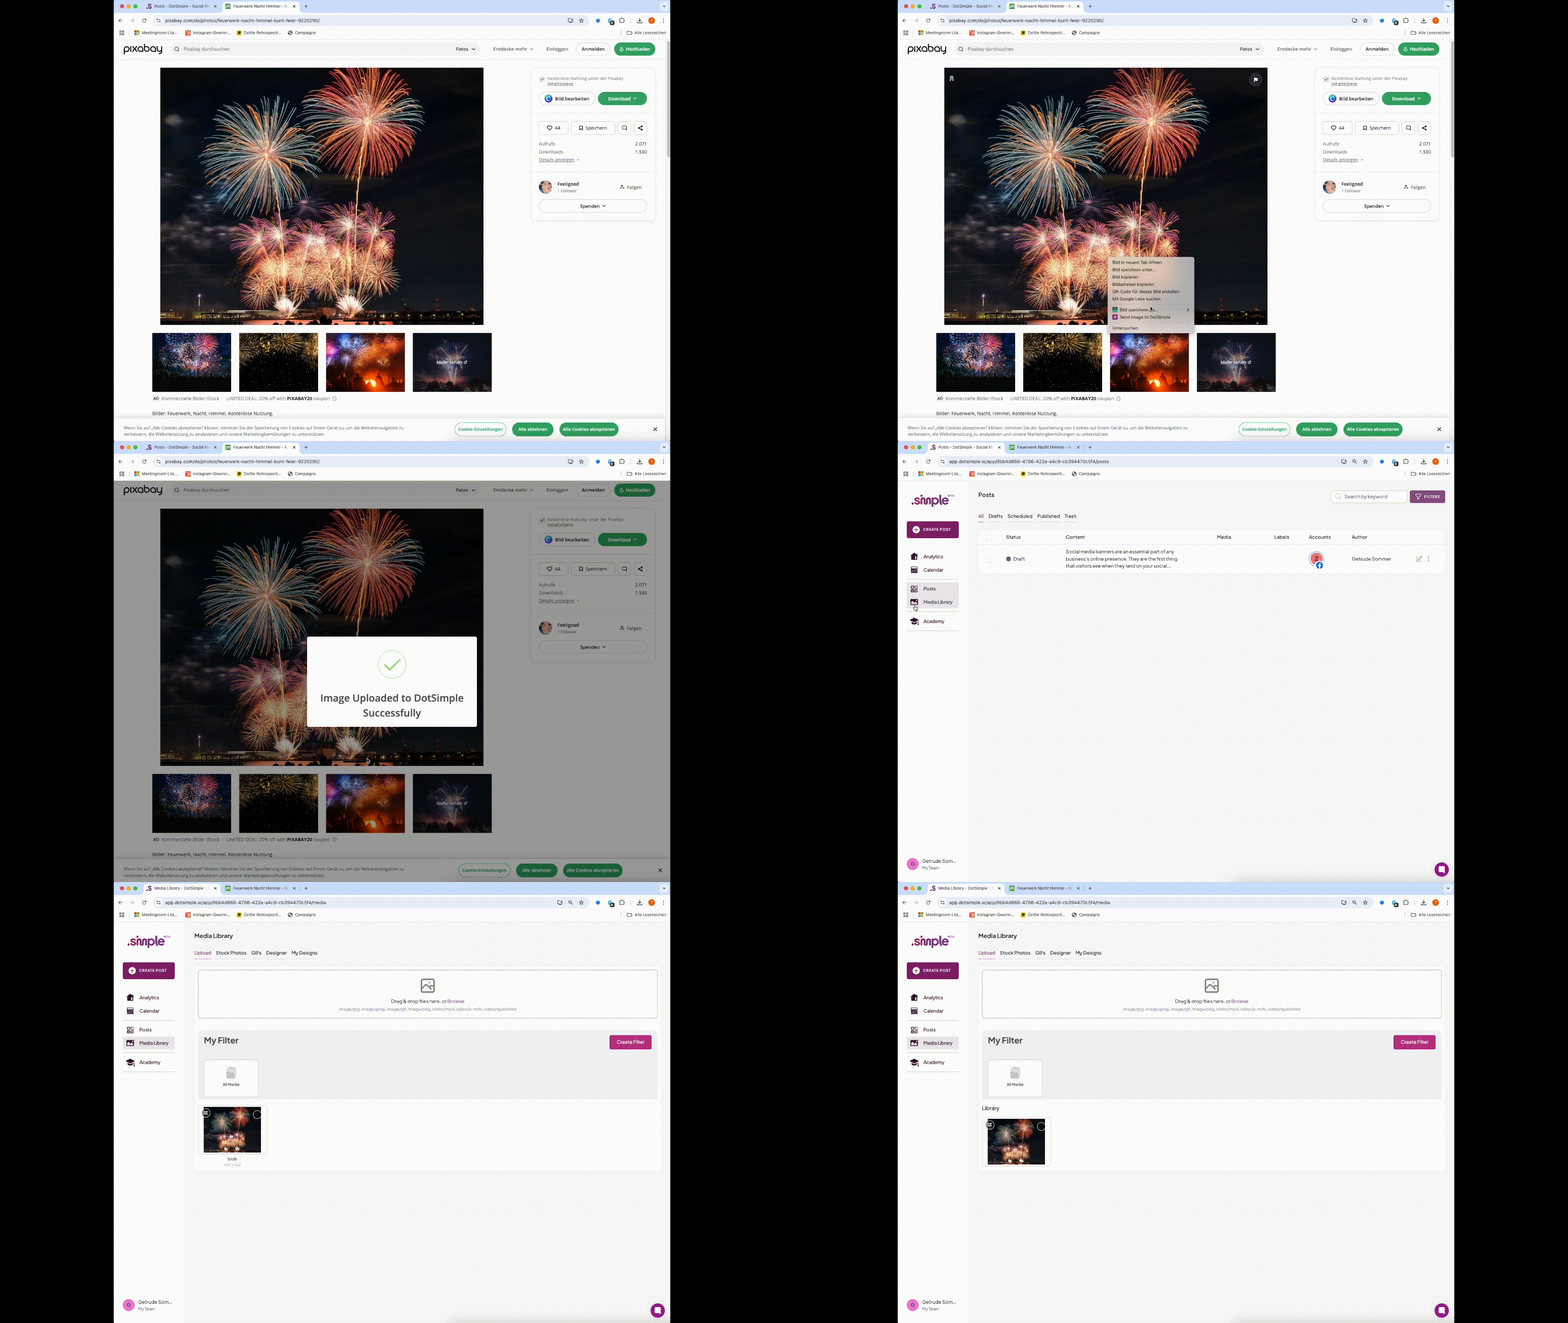
Right-click on any image on a webpage.
Select "Send this image to DotSimple" from the context menu.
A success notification will appear once the image has been sent.
If you need to update your Access Token or Workspace ID:
Click on the DotSimple extension icon in your browser toolbar.
Update the Access Token or Workspace ID fields as needed.
Click Save and Validate to reconnect.
Ensure your Access Token and Workspace ID are correct.
Verify that you have an active internet connection.
Revalidate your settings by clicking Save and Validate.
Refresh the page to ensure the extension is active.
Confirm that the extension has the required permissions.
Make sure the selected workspace and accounts are valid.
Confirm that the image or text content is not restricted.
Q: Where can I find my Access Token and Workspace ID?
A: Log in to your DotSimple dashboard. You can find your Access Token under Access Tokens and your Workspace ID under Settings —> Access Tokens.
Q: Can I send content to multiple accounts at once?
A: Yes! The extension allows you to select one or more accounts when sending text or images.
Q: What happens to the content I send?
A: The text is saved as a draft in your DotSimple workspace, and the images are uploaded to your media library.
If you encounter any issues or have questions, feel free to contact us.
Start using the DotSimple Chrome Extension today and simplify your social media content creation! 